You'll have no trouble finding the right words to say "I love you" with these Valentine Word Search Cookies from Confection Couture!
Here's what you'll need:

- Valentine Word Search Cookie Stencil
- Cookie Cutters
- 5" x 3 1/2" Rectangle
- 4" Square
- 2" Heart
- AirGenie Airbrush System
- Gyro-Cut Craft and Hobby Cutting Tool
- Cookie Magnets
- Plastic Bottle with Dropper Tip
- Quadrant Masking Tool (x2)
- Stencil Genie
- Screen Genie
- Wonderbar Accessory for the Stencil Genie
- DecoPac Airbrush Food Coloring
- Midnight Black
- Super Red
- Raspberry
- Petal Pink
- Sugar Cookie ingredients
- Red Jumbo Nonpareils
- Decorating Icing
- Decorating Bag
- Culinary Tweezers
- Glad Press'n Seal
- Paper Towels
Getting Started
The first step in the process is to bake and ice however many of each shape of cookie you desire. Allow the royal icing to harden before moving on to the subsequent steps.
Airbrushing the Pink Background


Thoroughly shake your bottle of Petal Pink DecoPac Airbrush Food Coloring and then place 5-6 drops into the reservoir of your AirGenie Airbrush System airbrush tool. Always test out the flow on a stack of paper towels (or piece of white paper) prior to spraying each color and cookie. Adjust the flow as necessary by turning the knob on top of the unit.
Apply the color to each cookie using light even coats. Shade the cookie by spraying multiple coats around the edge of the cookie and spraying more lightly as you move towards the cookie's center.
Repeat for all square and rectangle cookies.
Airbrushing the Red Hearts


If you have a second airbrush tool, switch it out now and load some Super Red into the reservoir. If not, then see below for instructions on cleaning the tool in between colors.
Airbrush half the number of heart cookies using multiple light coats.
Masking


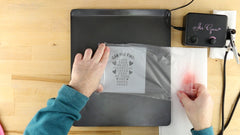
For the Word Search stencil, cut a piece of Glad Press'n Seal roughly the size of the stencil and place it over the top. Use your fingers to flatten it, removing any bubbles or wrinkles.
Next, use the Gyro-Cut craft and hobby cutting tool to trim around the body of the letters. Turn the blade sideways and use it to lift one corner. Then, peel back the plastic that's covering the outer hearts and border.
Stenciling the Red Elements


Take the Stencil Genie and separate the two portions. Place either the thicker piece of the thinner piece down on your work surface with the magnets facing up - whichever most closely matches the thickness of your cookies.
Now place the stencil over the square and then the Screen Genie over the top of that. Lock everything into place using the other piece of the Stencil Genie.
Use cookie magnets, in stacks of three or four, to further assist in pressing the stencil flat against the cookie surface.
Adjust the flow if necessary and airbrush the red colorant through the stencil. Lift away the assembly to reveal your lovely red border!
Stenciling the Red Hearts


For the "CAN YOU FIND:" stencil, repeat the above steps of masking with Press'n Seal. Trim around half of the heart stencil elements, alternating sides each time.
If your rectangle cookie is too large to fit inside the Stencil Genie, have no fear! Place the thicker portion down on the work surface, then the Screen Genie - only this time turn it upside down. Next, place the stencil upside down, then finally place the Wonderbar Accessory on either side of the assembly, using its magnets to hold it in place. Turn this assembly over and place of the the cookie.
Add magnets and airbrush through the stencil as you did last time.
Cleaning the Airbrush Tool, Stencils, and Accessories


Before changing colors in your airbrush tool, you'll need to clean it. To do so, rinse out the reservoir 3-4 times using water. Next, reattach the hose, refill the reservoir with water, and then run the tool on full power until its empty. Repeat once more using water, and then a third time using an inexpensive 100-proof vodka. Run the machine for a few extra seconds once the reservoir is empty to ensure that no liquid remains.
To clean the stencils and Screen Genie, simply rinse the under water and dry them completely using paper towels or a lint-free towel.
Stenciling the Raspberry Elements


Next, switch to Raspberry and airbrush the other half of the heart cookies.


Repeat the earlier steps in order to airbrush the remaining hearts of the "CAN YOU FIND:" stencil.
Stenciling the Black Elements


Next, load some Midnight Black into a clean airbrush tool.
Cover the Word Search stencil with plastic once again and trim around the letters exactly as you did earlier. Only this time, you will remove the portion covering the letters - not the hearts and border.
Airbrush the letters using light, even coats.


Next, take the other stencil and cover once more with the Press'n Seal. This time, trim around all of the words, masking off the heart elements.
Airbrush the words using the black colorant.
Adding Some Flair


To add some flair to the rectangle cookies, try adding some Red Jumbo Nonpareils. Using a decorating bag, add a small dab of decorating icing or royal icing to each red ball and use it as an adhesive to attach it to the edge of the cookie icing. Continue around the outside of the entire cookie, breaking only where the stenciled words approach the edge. Allow the decorating icing to dry completely.
Your Valentine Word Search cookies are ready to spread the word to your loved one/ones!


