


Start your October with a spook from these Ghost cookie cutter and stencil set from Confection Couture Stencils. Use this cookie decorating bundle to bake cookies for your Halloween goodie bags. Use the cookie cutters to make your cookies and the stencils to decorate! Confection Couture Stencils’ cookie stencils can be used with an airbrush or royal icing. These tools can be used alone or together to make a spooktacular batch of cookies for your Halloween Party. Check out the links below for everything used in this tutorial:
- Ghosts Cookie Stencil with 2 Cutters
- The Stencil Genie Cookie Decorating Tool
- Quadrant Masking Tool for Cookie Decorating
- Magnets for Cookie Stencils 10 piece set
- AirGenie Airbrush System
- DecoPac Airbrush Food Coloring

All the cookies cut with the Ghost cookie cutters line up perfectly with the ghost stencils. Bake a whole batch of sugar cookies then top coat them with royal icing before airbrushing. We recommend giving the royal icing a day to dry before decorating.
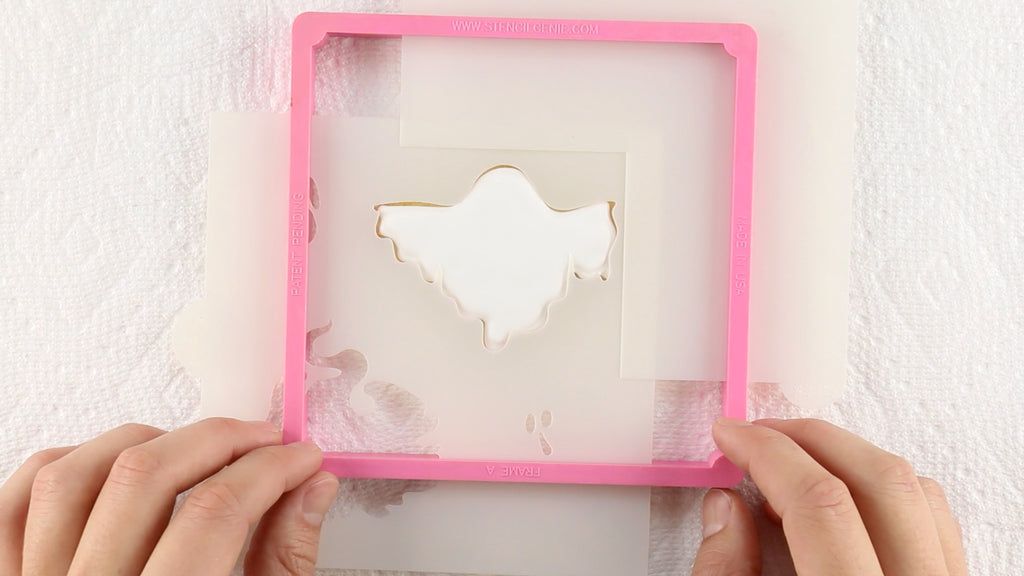
Start off by putting the ghost cookie stencil into the Stencil Genie. Use the quadrant masking tool to center the ghost design in the Stencil Genie. Line the ghost stencil up upon your first ghost cookie. The quadrant masking tool will protect any edges of the cookie that may be hanging out beneath the stencil.
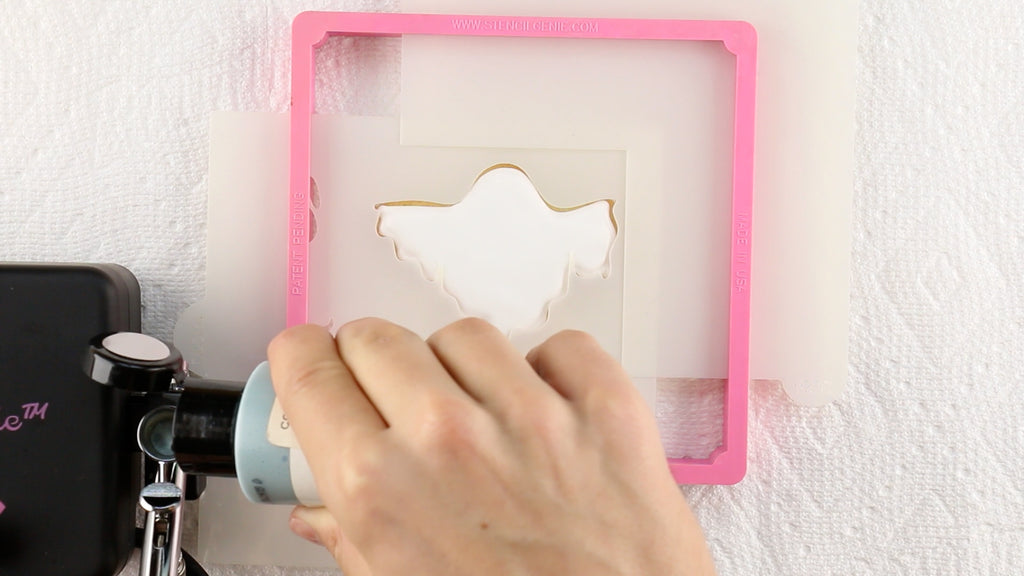
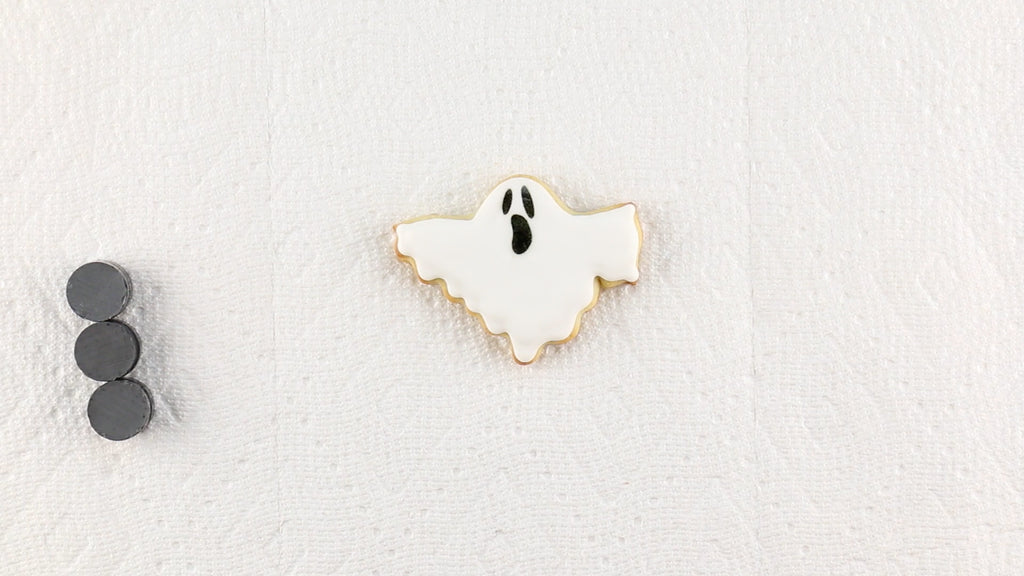
We’re going to stencil a few of these ghosts with Amerimist Silver Sheen Airbrush Color. Load the color well of the airbrush with the silver airbrush food coloring. It is important to test your airbrush on a piece of paper towel before stenciling your cookie. This gives you a chance to adjust the air flow of the Air Genie Airbrush System and ensures you don’t have a misfire on your cookie surface!
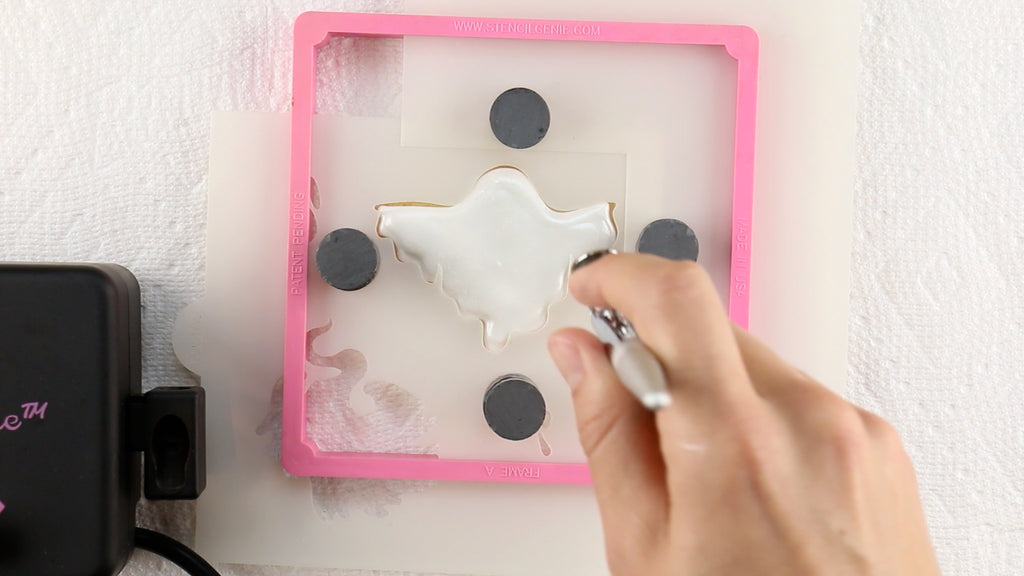
Place cookie magnets around the design to hold the stencil flat to the cookie surface. Hold the airbrush about 3-4 inches from the cookie and slowly build the color with a back and forth motion. Use a chopstick or wooden skewer in the other hand to hold the stencil flush with the cookie anywhere the stencil may not lay perfectly flat since every cookie is different!
After 2-3 passes with the airbrush you can remove the cookie magnets and lift off the Stencil Genie. Make sure that while you are airbrushing that the color comes out smooth and flat. Make sure you airbrush just enough food color so it doesn’t streak!
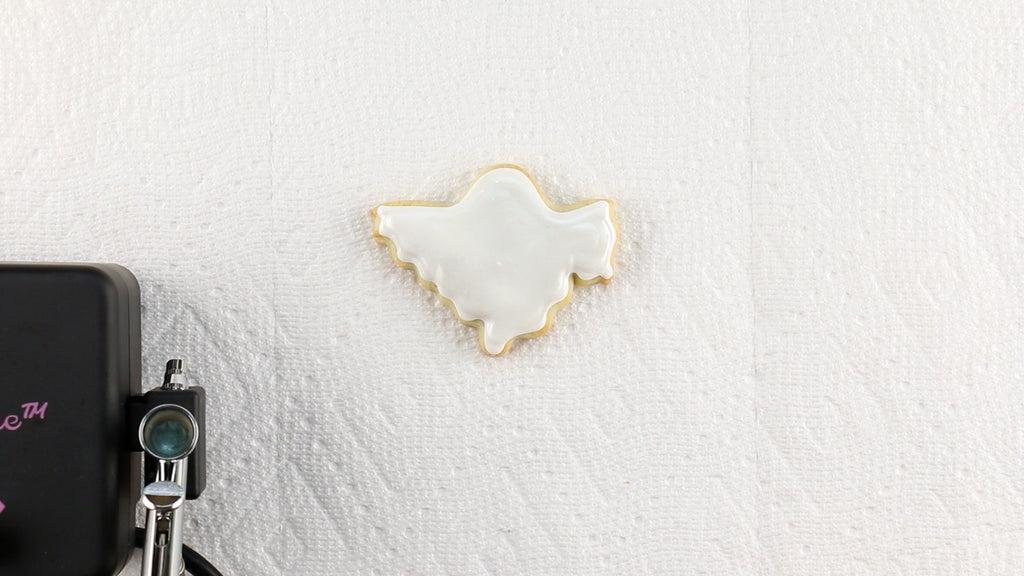
Here is an airbrushing tip: If you use too much food coloring, you may see droplets form on top of your cookie. These droplets run down your cookie or add to the drying time.
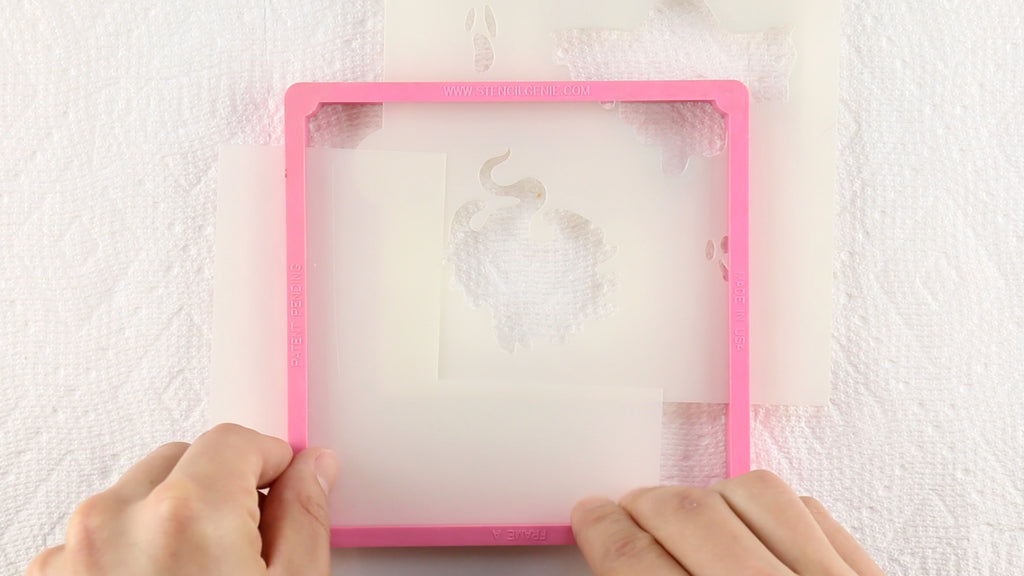
You can place the Stencil Genie onto your next cookie and repeat the process until you are ready to switch shapes. When ready to move on to the next ghost, rinse the food coloring off the ghost cookie stencil and quadrant masking tool, pat them dry with paper towel, then place back into the Stencil Genie.

Place the Stencil Genie on each ghost, hold the stencil flat with cookie magnets, and use the AirGenie airbrush to coat each cookie with the Amerimist Silver Sheen Airbrush Food Coloring!

Confection Couture Stencil’s Ghost Stencil comes with two spooky faces to airbrush onto your cookies as well. Line the face design up in the Stencil Genie along with the Quadrant Masking Tool right on top of the head of the Ghost. Now would also be a good time to get your airbrush ready to change colors. Do this by emptying out the airbrush into a sink. Then run water or vodka through the airbrush until it comes out clear. Water works fine, but we recommend vodka as it dries quicker. Use a small piece of paper towel to dab any moisture off the end of the airbrush and the color well before running it while empty one last time. Now you can load the Amerimist Super Black Airbrush Food Color.
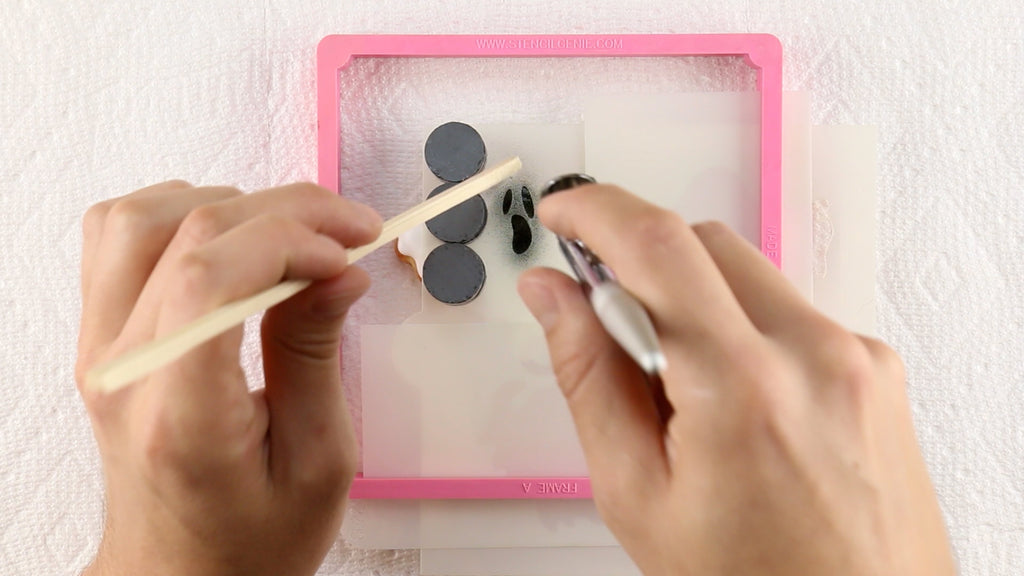
Place the cookie magnets around the face before light airbrushing the ghost’s face. Remember that less is more when stenciling. Too much food coloring can pool up in such a small area and bleed beneath the stencil surface.
When you have stenciled the face, remove the cookie magnets, and lift off the Stencil Genie. Always lift off the cookie magnets before taking off the Stencil Genie as the magnets may cause the stencil to shift unintentionally while lifting the Stencil Genie. It’s best to take them off first.
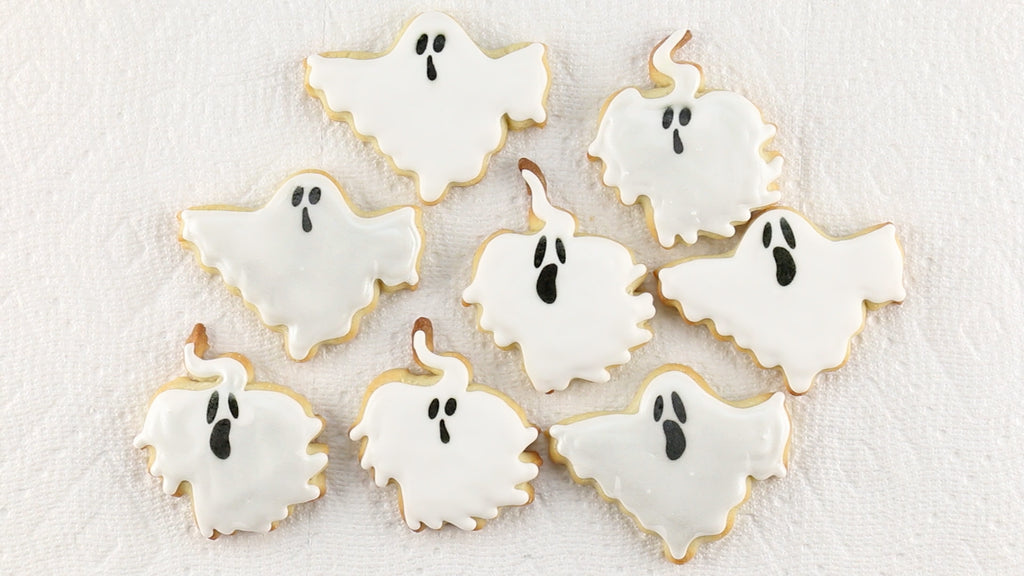
Try mixing up which face goes on which ghost! You can even rinse off the ghost stencil and flip it around to have the ghost face the other direction. Maybe instead of a silvery ghost you want a pure white ghost so you skip the background stencil altogether! Get creative with your own set of spooky ghosts!
If you liked this post be sure to visit https://www.confectioncouturestencils.com/ to browse more of our cookie decorating tools, tips, and techniques. For more on this tutorial, please check out the video on our Youtube channel below!