


Your friends and family will love these cookies a "latka" when you decorate them with these whimsical Hanukkah cookie stencils from Confection Couture!
What can you I use to stencil cookies?
Whether it’s airbrushing or using royal icing, Confection Couture has everything you need to stencil the perfectly beautiful and whimsical cookie! This includes an incredible selection of stencil designs for all occasions, airbrush systems, colorants, and accessories.
What kind of icing do you use for cookie stencils?
Royal Icing works best for either coloring and creating the stencil itself or for creating a perfect surface onto which to airbrush your stenciled design.
Can you airbrush cookies?
It’s easy to create beautiful designs on cookies or cakes using our incredible selection of stencils and accessories!
What do you need to airbrush cookies?
Confection Couture has everything you need to create whimsical designs on your cookies or cakes for any occasion!
What is the easiest way to decorate cookies?
Using stencils, in conjunction with either airbrushing or royal icing, is a super easy way to create exciting themed cookies for any holiday or celebration or just for the fun of it!
Here's what you'll need:

- Hanukkah Phrases Cookie Stencil
- Hanukkah Subway Background Cookie Stencil
- Oy to the World Cookie Stencil
- Challah La La La Cookie Stencil
- 4" Square Cookie Cutter
- AirGenie Airbrush System
- Gyro-Cut Craft and Hobby Cutting Tool
- Cookie Magnets
- Plastic Bottle with Dropper Tip
- Quadrant Masking Tool (x2)
- Stencil Genie
- Wonderbar Accessory for the Stencil Genie
- Screen Genie
- DecoPac Airbrush Food Coloring
- Electric Blue
- Malibu Blue
- Navy Blue
- Bronze Shimmer
- Sugar Cookie ingredients
- Royal Icing ingredients
- Glad Press'n Seal
- Paper Towels
Mixing Colors


For the lighter blue elements of the cookies, mix Electric Blue and Malibu Blue in roughly equal parts. You can mix them in a dropper bottle, which comes with a dropper tip. Once mixed, shake the bottle and pour 4-5 drops into the reservoir of the AirGenie airbrush tool. Test out the color on a spare cookie or white sheet of paper. Add more of any of the colors as needed until you achieve the desired shade.
Masking


To mask off intricate design elements, cut a piece of Glad Press'n Seal roughly the size of the stencil and place it over the top, pressing it into place to remove any bubbles or wrinkles.
Now, take a Gyro-Cut craft and hobby cutting tool and trim around the desired element - in this case the tent element between the trees. Turn the blade sideways and use it to lift the corner of the cut plastic. Then peel it away leaving everything else covered.
Stenciling


Separate the two portions of you Stencil Genie and place the thicker side down, magnets facing up. Next, place the stencil over the top with the tree and tent design centered in the middle of the square.
Place a Quadrant Masking Tool above and below the design to protect those areas of the cookie from overspray. Next, place the Screen Genie over the top and lock everything into place using the remaining piece of the Stencil Genie.
Place the entire assembly over the cookie with the design properly positioned where it will be airbrushed.
Lastly, use cookie magnets, in stacks of three or four to further help keep the stencil flat against the cookie surface.
Be sure to test out the volume of spray on a stack of paper towels prior to airbrushing each cookie and color. Adjust the flow as needed by turning the knob on top of the unit.
You can also use a long needle or chopstick to press down any of the stencil edges that are continuing to lift away from the cookie as you move around with the airbrush.
Apply the color in light coats using a small, circular motion. Once finished, place this cookie aside for now.
Finishing up the Light Blue Elements


Next up is the "Miracle" cookie. Mask off the "Eight Nights" and "Festival of Lights" text using the Press'n Seal. This time, instead of the Stencil Genie, which will not fit around this larger cookie, try using the Wonderbar Accessory to replace the bottom portion. Use the upper portion of the Stencil Genie as you did before.
The airbrushing process is the same.
Cleaning the Stencil Tools


To clean the stencils, masking tools, and Stencil Genie between colors, remove any Press'n Seal and rinse them in water. For the Screen Genie, you can either rinse it under running water or spray water backwards through the stencil. Dry everything completely using either paper towels or a lint-free dish towel.


To clean the airbrush tool between colors, rinse out the reservoir 3-4 times, then reattach the hose and fill the reservoir with water. Run the tool on full power until empty. Repeat this step twice more, once again with water and then a third time using an inexpensive 100-proof vodka.
Gold Elements


For the "Oy to the World" cookie, repeat the above masking and stenciling process for the Menorah, star, and laurel elements.


Next, mask and airbrush the stars on the Challah LA LA LA cookie.
Navy Blue Elements


Now, switch to Navy Blue and and airbrush the subway cookie - no masking required unless you want to make the different elements different colors.


Next, stencil the text on the "Oy to the World" cookie.


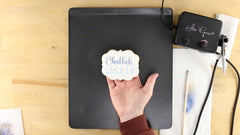
For simple masking jobs, such as the "Challah" text, try using a Quadrant Masking Tool to isolate it from the rest of the elements.


Finally, mask and airbrush the remaining text on the "Eight Nights" cookie.
