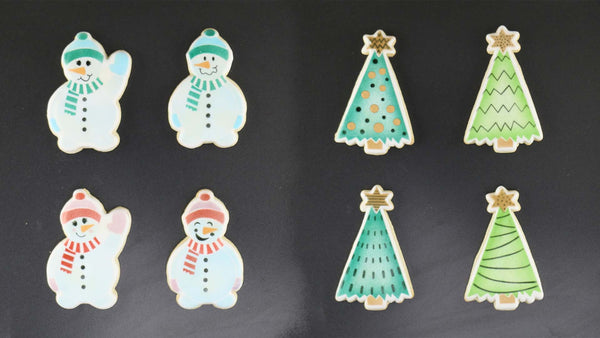
Your creativity will shine as brightly as the lights on the tree when you make these "Dress Your Own..." Christmas Cookie Confection Collections from Confection Couture.
This tutorial covers four different cookie stencil/cutter collections that are available. The instructions below detail specific ways of decorating your cookies but remember: the idea of these kits is so that you can create your own unique designs and combinations!
See the links below to purchase one, two, three, or all four today!
Here's what you'll need:

- Dress Your Gingerbread Cookie Stencil Set With Cookie Cutter
- Dress Your Snowman Cookie Stencil Set With Cookie Cutter
- Dress Your Elf Cookie Stencil Set With Cookie Cutter
- Dress Your Christmas Tree Cookie Stencil Set With Cookie Cutter
- AirGenie Airbrush System
- Gyro-Cut Craft and Hobby Cutting Tool
- Cookie Magnets
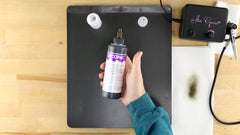
- Plastic Bottle with Dropper Tip
- Quadrant Masking Tool (x2)
- Stencil Genie
- Screen Genie
- Ateco 1385 Tapered Offset Baker's Spatula with 4" Blade
- DecoPac Airbrush Food Coloring
- Midnight Black
- Super Red
- Emerald Green
- Lime
- Gold Shimmer
- Bronze Shimmer
- Harvest Brown
- Malibu Blue
- Tangerine
- Petal Pink
- White
- Sugar cookie ingredients
- Gold Sugar Pearl
- Gold Luster Dust
- White Royal Icing
- Decorating Comb/Smoother
- Decorating Brush
- Glad Press'n Seal
- Paper Towels
Getting Started
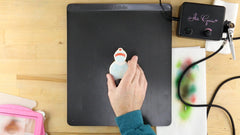
First, bake the desired number of cookies and cover each with a layer of white royal icing. Allow at least a couple of hours for the cookies to cool completely and for the icing to cure.
Mixing Colors


For the base color of the gingerbread people cookies, you may want to mix some different colors of DecoPac airbrush food coloring to achieve the perfect shade of brown. I did this by first mixing some Harvest Brown with some White in a dropper tip bottle, shaking it well, and testing it on a white piece of paper. The result was almost perfect but the brown still needed a little punch so I then added a couple drops of Tangerine. That did the trick!
Adding the Base Color to the Gingerbread Cookies


Load 5-6 drops of the mixture into your AirGenie airbrush tool reservoir. Always test out the spray intensity using a stack of white paper towels (or white paper) prior to airbrushing each color and cookie. Start out with a light coat over the entire gingerbread person cookie and then add more color all the way around to give it the illusion of the cookies being more cooked around the edges.
Repeat for all of the gingerbread cookies.
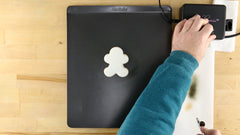
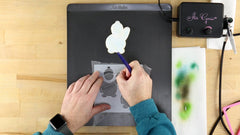
Giving the Snowman Designs Some Definition


For the snowman cookies, load some Malibu Blue into the airbrush tool. Be sure to clean your tool between colors:
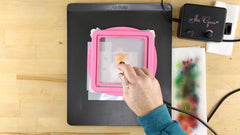
Place the background stencil onto the thicker portion of your Stencil Genie. Cover this, first with the Screen Genie, and lock everything together with the Stencil Genie top. Place the assembly over the cookie and use Cookie Magnets to help press the stencil flat against the curved surface of the cookie.
Apply a light coat of blue through the stencil to give the overall shape of the snowman some definition. Repeat for all snowman cookies.
Adding the Outline of the Elf Feet


For the Elf Feet cookies, repeat the above step, only this time using Gold Shimmer. Omit the Screen Genie for the shimmer colors as the screen tends to trap the larger particles that give the the colorant it's sparkle.
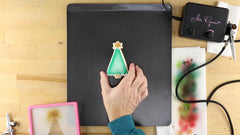
Shading the Green Tree Elements


For the Christmas Tree cookies, you'll want to isolate the tree stencil element from that of the star and the tree trunk. To do this, cut a piece of Glad Press'n Seal and place over the stencil, pressing it to remove any bubbles or wrinkles. Next, use the Gyro-Cut craft and hobby cutting tool to trim around the tree element, turn the blade sideways to lift the corner, then peel away the cut portion.
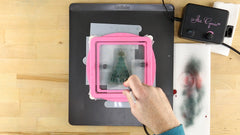
Now, load the stencil into the Stencil Genie/Screen Genie apparatus and place over the cookie. Apply the color, first the lime and green and then the emerald, using the same shading technique that you used with the gingerbread people.
Royal Icing Border for the Gingerbread Cookies


Next up is the icing border on the gingerbread cookie. Load the stencil so that the design is centered in the square. Then, use Quadrant Masking Tools around the stencil to protect the edges of the cookie from rogue icing. Place the assembly over the cookie and use a baking spatula to apply white royal icing through the stencil. Then use the flat edge of a cake edger/scraper to remove excess icing and fill in any gaps. Carefully remove the stencil to reveal the edge. Place these cookies aside for a couple of hours to allow the icing to cure.
Adding Elements to the Snowmen


While you still have Emerald loaded in your airbrush tool, use the Press'n Seal to isolate the hat cuff, pompom, and alternating stripes on the scarf for the snowman. Airbrush half the cookies with green and then switch to Super Red for the other half.
Adding Elements to the Elf Cookies


Repeat the process of isolating stencil elements in order to airbrush the alternating stripes/features of the Elf stockings.


Do the same for the alternating red elements.


Next, use the Quadrant Masking Tool to isolate the "feet" of the main stencil and airbrush red through these openings.
Adding the Stars and Trunks to the Christmas Trees


Now, load the tool with Bronze Shimmer and repeat the Press'n Seal and trimming process from the earlier step with the tree cookies, this time removing the film that covers the stars and tree trunks.
Airbrush as described above (sans Screen Genie).
Additional Snowman Stenciling


Next, for the snowmen/women, airbrush the remaining hat elements and gloves, first using a slightly heavier coat of Malibu Blue for half of the cookies, and then Petal Pink for the other half.
While you have the pink loaded, isolate and airbrush any cheek elements using the stencil with the facial features.


Switch to Tangerine and color the carrot noses of all the snowmen cookies.
Finishing the Gingerbread Cookies


Using red and black, isolate and airbrush additional elements of your choosing for the gingerbread cookies.
Alternatively, you can stencil some of the outfit elements using colored royal icing. This is a bit tricky, however, and is only recommended for folks who have more experience in the royal icing stenciling arena.
Finishing the Snowman Cookies


Use black to complete the facial features and expressions of you choosing for all of the snowman cookies.
Finishing the Christmas Trees


Also use black to add decorations and flair to the Christmas Tree cookies!
Finishing the Elf Cookies


To complete the Elf cookies, use Bronze Shimmer to airbrush any remaining features. If you desire, add some Gold luster dust to these elements using a brush and a tissue to sweep away loose particles. You can also add some Gold sugar pearls to the shoes by using a tiny dab of royal icing to the pearl and using it as an adhesive.
Your Christmas Cookies are now complete and "Dressed" for success!